Tuesday, November 16, 2010

Gratitude Garland


I was looking for a good Thanksgiving project to do with my 4 year old.  When I saw this project on Simply Modern Mom, I knew I had found it.  It was a great way to teach my preschooler about the thankful part of Thanksgiving.  And it looks cute on my mantle too.

To make it, I drew leaf shapes on some left over scrapbook paper scraps.  I also drew some on a cut up Trader Joe's bag.  Some leaves I drew on the back and some I drew on the front because the colors on the bag are just perfect for fall!  Then I crumpled them up before cutting them out.  Simply Modern Mom used raffia to braid her garland together.  I used a hole punch and twine - 2 holes per leaf to hold them in place.

I'm thinking that this will become a Thanksgiving tradition!

Sunday, November 7, 2010

Sunday, October 24, 2010

Ladybug Princess

Here is Abby making her debut as a ladybug princess:


I made the skirt using this method from Just We Moms.


I made the top by fusing some big felt circles onto a tshirt from Target with Lite Steam-A-Seam.  I ended up having to sew them down too, though.  The felt is too thick and didn't move with the shirt, so the circles would pull up.  But really, this could be a no sew costume by using better fusing or thinner fabric.


I already had the wings and antennae from a party favor.  They are really what inspired the whole costume.  (Thanks, Lesley!).  But I think you could make some using this method, but with red cellophane and/or some paint: Fairy Wings at At Second Street. 


Wand coming soon...

Tuesday, October 19, 2010

Butterfly Fabulousness

We went to the most MOST amazing butterfly party over the weekend.  Here are a few pics:


Friday, October 15, 2010

My One New Halloween Decoration This Year


When I saw the Jane Of All Crafts Halloween subway art  using rub on transfers from the dollar section at Target I had to IMMEDIATELY head to my local Target and see it there were any left.  Luckily, there were. 

I decided that I wanted to do mine on a board instead of in a frame, though.  So I got a board (thanks Uncle Jim!) and went to work.  I painted it white and just rubbed on the transfers (with the help of my 4 year old).  Then I thought it needed a little extra drama so I dabbed on some orange polka dots.  Which kind of make it look like it was shot with a paintball gun, but oh well.  I like it anyway. 


You can see pictures of it sitting on my mantle in this post.

Sunday, October 10, 2010

I Love Decorating for Halloween!


I am very excited about our mantle decorations this year.  I love not having one static picture over the fireplace, but, instead, the ability to change it with the seasons/my decorating whims. 


 I got the BOO ghosts from The Long Thread.  I'm pretty sure the template for the bats came from there too.

I got the mod pumpkin idea (in the upper right corner) from Hostess with the Mostess.

The paper for the colorful bat paper was printed from Living Locurto via Disney's Family site.  It was supposed to be cut into labels for small cans, but I used it this way instead.

And the sign in the bottom right was made via inspiration from Jane of All Crafts.  It will get a post of its own later.  Promise.

Friday, August 27, 2010

Let's Make a Memory Game!


Abby's favorite twins recently had a birthday.  For one of their shared presents Abby and I decided to make them a personalized memory game.  It was so easy and turned out so cute.  I see various personalized memory games occasionally around the interwebs and decided to try it out myself.  Most of the versions I looked at involved chipboard squares or leftover cardboard and spray adhesive.  I went the lazy way and used craft foam that had one side that was peel and stick (found in the kids craft section of the craft store).  And I couldn't be happier with the results!

Here's how to do it my way:

1.  Buy 2 pieces of 8.5x11 craft foam that has pattern or glitter or a pretty color on one side and peel and stick adhesive on the other.
2.  Use your favorite picture editor (mine is Picasa) to pick out 9 different pictures (mine are of the kids all playing together). 
3.  Print them, wallet size, on a piece of regular printer paper (2 copies because each picture needs a match). 
4.  Peel the backing off of the foam page and stick the picture page to it. 
5.  Carefully cut each picture out.

This will give you 18 cards (so 9 matches), which seemed perfect for our 4 year olds.  The game goes, pretty quickly though.  You could easily do another set of 18 to make the game more challenging. 

Add a title card and maybe some directions and tie it all up with a cute ribbon and you are good to go!


Thursday, August 19, 2010

Halfway Cookie Madness


Just when I think I've tried every cookie recipe out there, the universe turns up one I've never seen before. How is this possible? I don't know, but I like it. This time it was Halfway Cookies that I came across on Cookie Madness. They have a brown sugar merengue topping that I just HAD to try. Immediately. And, wow, it was tasty.

She's got a few different versions of the recipe on her blog. I went with this one, which has more butter in the crust. There was almost too much butter flavor for me, so I think that the next time I make these (and I'm sure there will be a next time) I'll go with the less butter version.
Posted by Picasa

Tuesday, July 13, 2010

Bleach Tee


Welcome to my new favorite gift! While stumbling around on the internet one day, I came across this post from Jamee. I immediately fell in love. It meets all of my criteria for an awesome birthday present: cute, personalized, good for all ages, works for girls OR boys, easy to do, and cute, cute cute!

Here's how to make my version:

1. Find a good shirt. (The darker the color of the shirt, the better your results are going to be.)
2. Play around in Microsoft Word until you spellout the name in a font and size you like.
3. Print it out on freezer paper. (I like using freezer paper because then I don't have to worry about the letters moving around and ruining my project.)
4. Cut out the letters with regular ol' scissors
5. Place the letters on the shirt and iron them on
6. Fill a spray bottle with bleach
7. Go outside
8. Lay the shirt on the grass and lightly mist all over with the bleach. (I sprayed from a couple of feet above and let it fall onto the shirt in order to get nice, even coverage. Get a little heavier with the spray up around the letters to ensure that the letters stand out. Also, do a light coat and then wait a minute or two because the bleach spots will continue to deepen, then spray more bleach if needed. If you saturate the shirt too much then you will just end up with a white shirt.)
9. Do the back of the shirt
10. Let dry
11. Peel off letters
12. Admire

Wow, by turning this into 12 steps, I'm making it look more complicated than it really is. It is super simple and super cute, so go give it a try.
Posted by Picasa

Monday, July 12, 2010

Homemade Popsicles


One of our favorite summer treats around here is homemade popsicles. I bought a set of popsicle molds at Target a couple of summers ago and we have gotten quite a bit of use out of them. There are so many possibilities and Abby loves to invent new flavors to try out. Here are some of our favorites:

Smoothie Popsicle - We make these ALL THE TIME. If we have smooties for breakfast we'll just pour any leftovers into the molds for a frozen treat later in the day. Sometimes I'll let Abby have one for breakfast, which she thinks is Awesome!

Pudding Pops - Just make your favorite pudding as directed and immediately pour into the molds (before it sets up). So so so yummy.

Juice Pops - You could also do something as easy as pouring orange juice or lemonade into the molds for a refreshing treat. Add some cut up fruit and they'll be even better.

Seriously, what are you waiting for? Go buy some popsicle molds!
Posted by Picasa

Wednesday, June 30, 2010

4th of July T-Shirt


Here's the shirt I made for the 4th of July.  I used some old (vintage?) rick rack that came from my grandmother's house and some white embroidery thread from a thrift store.  

I hope you all enjoy the holiday weekend!

Wednesday, June 23, 2010

Happy House-iversary to Us!


We bought our first home 1 year ago.  It was a short sale (which is the step before foreclosure) and not in very good shape and with all of the little home improvement projects we never got around to having a house warming party.  This is something that we really regret and so we decided to have a party celebrating the one year mark.  We called it a House-iversary Party!

A few weeks ago I won a blog drawing hosted by Paper Glitter.  I was so excited!!  I got to pick some printables out at her fabulous Etsy shop.  I spent a ridiculous amount of time looking it over and deciding what to get.  There are so many cute choices.  One of the kits I finally decided on was the Kawaii Sweets Birthday Party Kit.  It came with sooo many cute pieces!  I picked out some of the non-birthday specific parts of the kit and worked my theme around them.

For example, I used the printables to make little signs for the food:


We decorated above our fireplace with some "before" pictures of the house, so that people could see some of the changes we made. 

One of the highlights of our party (to me, anyway) was our ice cream sundae bar.  I made a couple of different chocolate sauces, a caramel sauce, and a marshmallow sauce.  And I used the Paper Glitter printables to make cute labels for the jars.  I wanted to do all homemade ice cream, but knew that it wouldn't stand up to the summer heat (it gets REALLY hot here), so I satisfied myself with just making the sauces.


I declare the party a success!

Thursday, June 17, 2010

Superheroes Activate!


I was part of a superhero party a few weeks ago.  I can't disclose the details because of the top secret nature of our mission.  I can, however, show you the cupcakes Abby and I made for the event.  The toppers were made using the superhero printables generously provided by Living Locurto.

Wednesday, June 2, 2010

I Love Flowers in the Spring


I have been doing lots of sewing for little girl birthday presents.  Sadly, I have been taking very few pictures of it all.

Here are some pictures of an outfit I did for one of my Utah kids, Taytum.  I bought the yellow outfit at Target and then had some fun with applique.  Most of the rick rack came from my grandmother's house (Taytum's great-grandmother) and was probably left over from some project by my grandmother or one of my aunts many many many years ago.  I love that the rick rack lives on in  projects a few generations down the line.

Here are a couple of bonus pictures of Taytum and Abby.  Abby is wearing a dress I made using LBB's Sienna Pattern.  It is my favorite of the few that I've made.  Can you believe that Taytum is 2 years older than Abby?


Update:  Someone asked for a closer crop of the applique, so I've added one.  Any more questions?  Just ask!  :)

Tuesday, May 18, 2010

Kit Kat Cake


This is the cake we made to celebrate my cousin's 6th birthday. Grandma Janie had seen some pictures of Kit Kat cakes and decided that it would be the perfect cake for Taytum's birthday. I couldn't agree more. It was so amazingly easy to make. We used boxed cake mix (I promise that there is cake under all of that candy) and canned frosting because we were in a hurry. It is a great cake to do when you are in a hurry or have kids helping you (or both) because it doesn't matter if the cake is a bit uneven or if you frost it wonky because you are covering it all up anyway! Just do a search for Kit Kat cake on Flikr and you will find several adorable versions of this cake for inspiration.

UPDATE: I'm so excited that my cake was featured on One Pretty Thing. I want to make sure that I give a shout out to the cake that probably inspired mine the most: this one from Cakeoholic.

ANOTHER UPDATE:  I think we might try a 4th of July version of this cake with white chocolate Kit Kats and red, white and blue M&Ms.  Sounds like it would be cute, don't you think?
Posted by Picasa

Saturday, April 24, 2010

A Healthier Start to the Weekend


In my quest to add healthier stuff into my recipe book I have tried quite a few granola bar recipes. Sadly, I have had very little luck in making a granola bar that will actually stay in bar form. Most of the time they crumble back into the granola I started with in the first place, leaving a big mess. This can sometimes be solved by using a recipe that calls for a lot of corn syrup, but at that point I might as well just make cookies.

So I was ridiculously excited to find this recipe. I have tried it twice now with excellent results. As long as you really smoosh it into the pan before baking, your bars will hold their shape better than any bars I have yet seen. And they're tasty too!

I started with this recipe from Alli 'n Son. I stayed pretty close to her recipe, but adjusted it for a smaller pan and made a few changes. So for us the recipe morphed into this, which I baked in my 9x9 pan:


Peanut Butter Granola Bars


Dry Ingredients:
2 cups old fashioned oats
1/2 cup chocolate chips
1/3 cup peanuts, crushed
1/4 cup crushed almonds (crushed pretty small, we don't like big chunks)
1/4 cup wheat germ
1/4 cup whole wheat flour
1 tablespoons flax seeds
2 teaspoons ground cinnamon

Wet Ingredients:
1 cup creamy peanut butter
1/4 cup honey
1/4 cup agave nectar
1/8 cup canola oil
1/2 teaspoon vanilla


Preheat the oven to 350º. Spray a 9x9 pan with cooking or baking spray. In a large bowl combine the dry ingredients. In a small bowl, stir together the wet ingredients (heat them up in the microwave for a few seconds if you are having trouble). Then add the wet to the dry and mix well. Press very firmly into prepared pan. (Really smoosh it in there, this is what helps keep them from crumbling). Bake for 15 minutes or until starting to brown around the edges.

Thursday, April 8, 2010

Billie's Mud Pie Cookies


Are you familiar with MixingBowl.com? I'm not, but someone gave me a copy of the magazine a couple of months ago and I LOVE it! I've made several of the recipes, both sweet and savory, with good results.

Today Abby and I decided to make Billie's Mud Pie Cookies. We used the recipe in the magazine, but I found the recipe on the MixingBowl site too, and they're basically the same. I did make a few changes though. I used a handful of chocolate chips instead of nuts and I added a little bit of instant coffee powder to half the dough because I really like the coffee/chocolate combo and I wanted to compare the results. Really liked what the coffee adds. Oh, and I used Scharffen Berger cocoa powder.

Go make these. They're a good chocolate cookie with great texture and they're not overly sweet.

Sunday, April 4, 2010

Tulips for Spring


I'm going over to my brother's house today to spend Easter with my family. This is a shirt that I made for my niece. It is so springy and fun. I just love it!

I hope your Easter is filled with things that bring you joy.
Posted by Picasa

Friday, April 2, 2010

Spring Happiness!


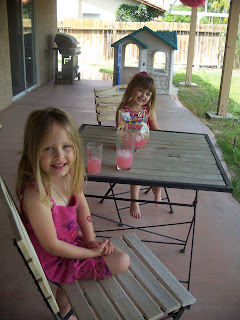
We're enjoying a beautiful Friday with a glass of pink lemonade. Hope you are too. Cheers!
Posted by Picasa

Monday, March 29, 2010

Pinkalicious!

Abby turned 4 this month and decided on on a Pinkalicious theme for her party. If you haven't seen the book, you should really check it out. It is very cute.

We decorated with a combo of handmade and store bought. I sewed the circle and cupcake garland/streamers. And I made the tissue paper balls using this tutorial from Happy Together. I plan to hang them both in Abby's room now that the party is over.


We made wands like the one's Pinkalicious carries. I used giant pink pixie sticks (super discounted on Valentine's clearance) for the stick. Then I bought a couple of sheets of gold craft foam and used my cookie cutter from last year's wand cookie favors as a stencil for the wand toppers. It was great because I just pushed it into the foam until it left an outline and then just cut around it. Saved lots of tracing time. We decorated the wands with ribbon, stickers and glitter glue that I already had on hand. Best inexpensive craft ever!


I usually pride myself on my birthday cupcakes, but really ran out of time this year. I used a couple of different vanilla cupcake recipes from the Cake Mix Doctor book with homemade buttercream frosting. I dyed everything pink, of course. Got the cherries on top, but didn't have time to do the dark pink piping. And Abby wanted to help decorate them (and it is HER party, after all) so she and her friend, Mia, were on sprinkle duty. So even though they were not true to the book, I still think they were adorable. And tasty!


The rest of the food consisted of various green foods, of course. Seriously, go read the book if you don't know what I'm talking about.


Favors consisted of goodie bags full of Pinkaliciousness! My Aunt Carolyn had a ball putting these bags together (Thanks Aunt Carolyn!) and I added my personal touch of these little personalized candy notes. I sent my husband this link and asked him if he thought he could recreate them. Well, it looks like the answer was yes!


All in all, I was very happy with how everything turned out. And more importantly, Abby was too!